Sharing a step by step for Lavinia stamps.
I hope you are all having fun and enjoying the new stamps,
they are fabulous,
Good luck with the competitions.
Enjoy they fabulous samples, videos and step by steps that
the design team have done to inspire you.
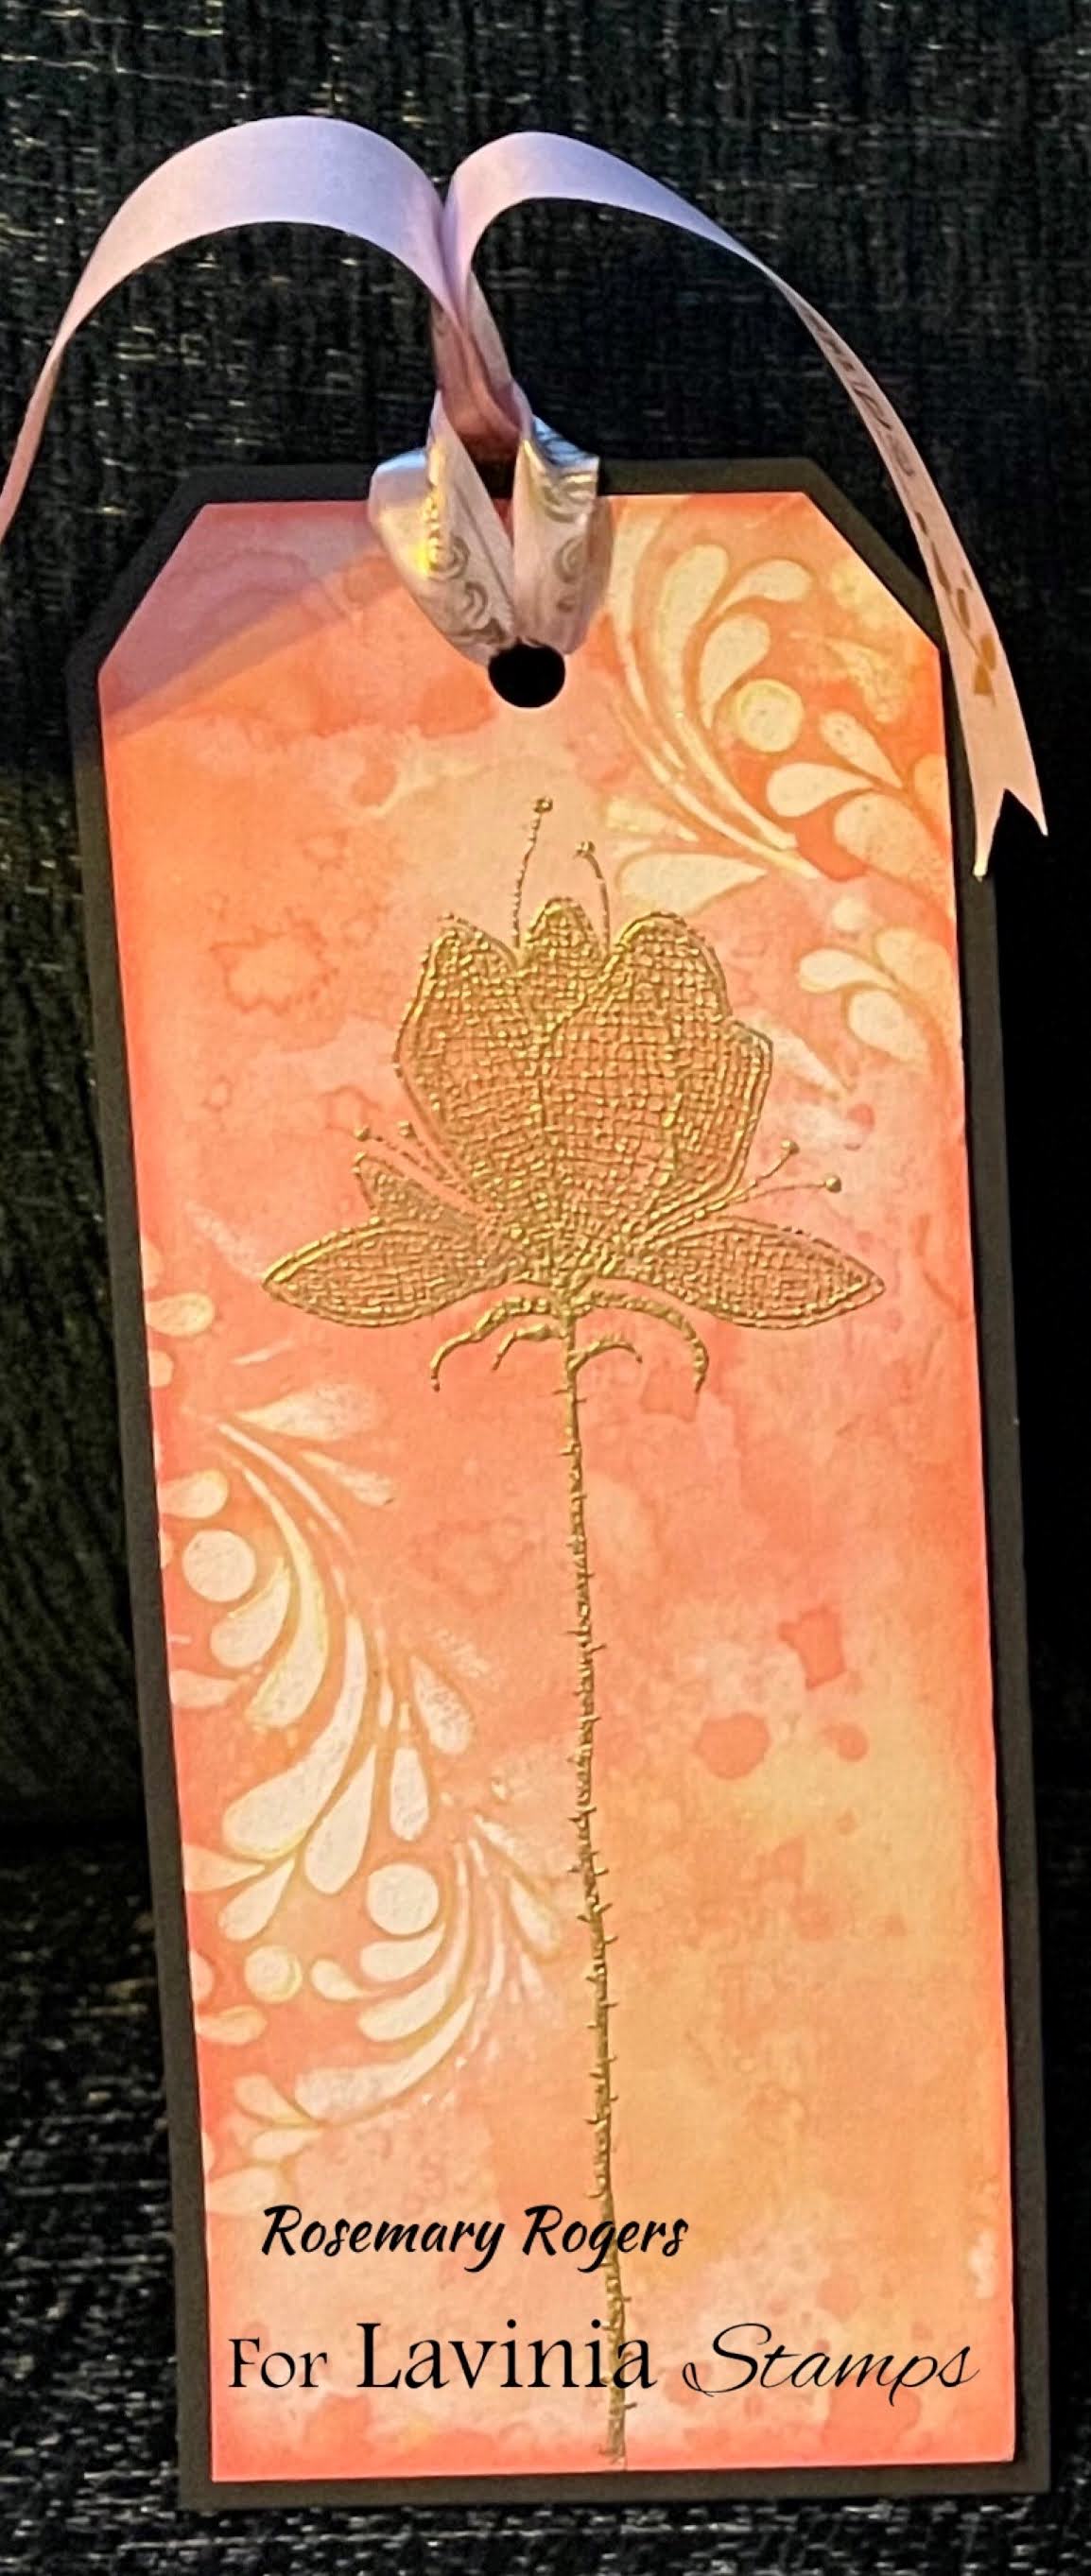
Lilium Flower card and tag.
Products used for this project.
Lilium set Magic
surrounds us words


Step 1.
I had a piece of multifarious card measuring 24 x 15 cm, I cut the card to a 15cm square, and decided to use the smaller piece as a gift tag.


Press all 3 colours onto mat then spray with water, spray a little water onto card then press card into the ink, lift the card dry with heat tool.


Place feather leaf Stencil onto card, then using white
acrylic paint and small sponge, gently tap paint onto card and tag, do this in
a couple of random areas, allow to dry.

Using a stamping platform, rub card with powder then stamp
larger Lilium flower using versamark, then heat emboss with gold embossing
powder, repeat either side of large flower with the smaller flowers. Stamp a
single Lilium flower on the tag.

Using an acrylic block and versamark ink stamp Magic
surrounds us words stamp, then rub gold mica powder over image with a soft
brush. Leaves a faint shiny effect on the card. Repeat on tag.


Matt and layer the square topper onto black and white card, then frame or mount onto 8 inch greeting card. Cut out desired tag shape then mount onto a larger black tag shape. Punch hole in centre and thread ribbon or string through.
Look forward to seeing all your beautiful creations with the
new stamps.
No comments:
Post a Comment