Translate

Showing posts with label spectrum noir sparkle pens. Show all posts

Tuesday, 21 May 2019

Sweet Poppy stencils. 

Hello All. 
I’m so happy to tell you that I am now officially on the Sweet Poppy stencils Design team. I feel very honoured to have been asked to join such a wonderful team of designers. 

Sweet Poppy Stencils are back on Hochanda on 21st May @ 11am & 3pm with their fabulous stencils and stamps. Please tune on Tuesday watch Lucy demonstrate some fabulous techniques. 

They also have some wonderful new stamps. 

Broadcasting Live on Sky 673, Freesat channel 817, Freeview channel 85, and streaming in HD online 
www.hochanda.com

Here is a link to the website. 
https://www.sweet-poppy.com/catalog/sweet-poppy-stencil-stamp-dragon-p-1708.html

Sharing some of my samples.
For this sample I have used the Phoenix stencil ,
There was some water colour left on the stencil, so I placed on card 
and spritzed with water. When I noticed the colour spreading onto the card I lifted the stencil.
Cleaned  and dried it, then placed it back onto the dry card and inked through the stencil with 
Archival black ink. 
                                                                                             
For this card I used zig water colour duel tip pens and drew around each part of the stencil with 
the thick end of the pen. Then removed the stencil and spritzed water at it, left it to dry naturally. 
Then inked through stencil with black archival ink. 

This card was made in collaboration with my best friend Tracy Nutton. 
The background was repeated stamping until whole card was covered. 
The eye stamp from the set was coloured with zig water colour pens. The red centre of the eye was coloured 
with sweet poppy stencil mica powder. For the frame I used silver paste sprinkled with red and grey mica powders then heated until it bubbled. Mounted on Black and red card. 

Black tip was stamped in black versafine and embossed with clear embossing powder. 
I then coloured him with zig water colour pens, I scribbled them onto my craft mat then using a little water on a bush I painted the dragon using a gunmetal colour and a beige colour. I stamped the faux skin stamp three times then cut them in 3 different sizes to make the flower. 

Black tip Stencil
   I used navy blue and olive gold mica powders from sweet poppy stencils over silver paste, then heated until paste bubbled. the background was done using the Faux dragon leather back plate, using bundled sage and  crushed olive distress oxide. Words stamped with versafine black onyx ink. 


I used a blue and purple zig pens scribbled onto my craft mat then spritzed with a little water before smooching card onto the colours, drying card in between each colour, coloured the dragon with the same pens, cutting around stamp on the scan and cut, was very happy with the cut was near perfect, then mounted onto card with foam pads. 
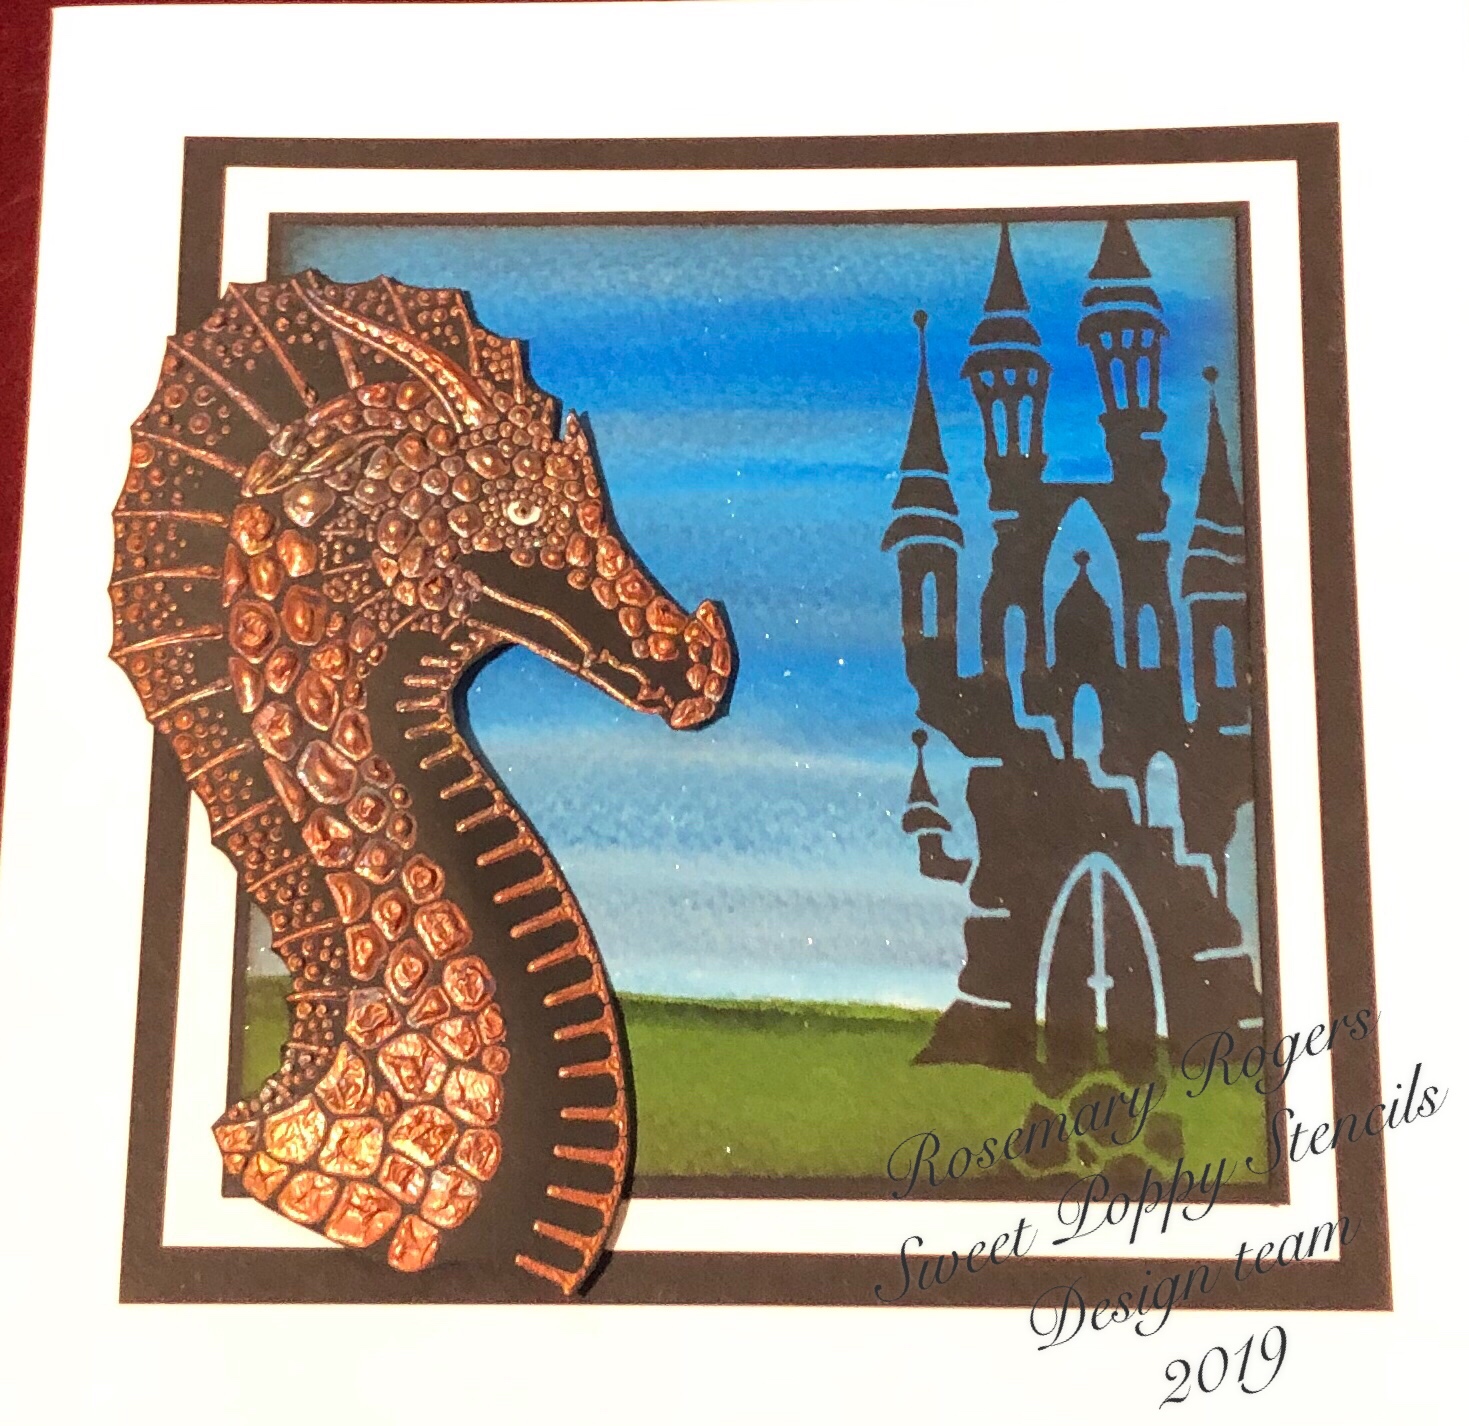

I used sparkle pens in blue, green and a little purple onto card then brushed over with a wet paint brush, for the back ground. Dabbed through the castle stencil with archival black ink using a stencil brush. used copper paste through stencil then sprinkled with a little silver mica before heating with heat gun to get the bubbled effect, also used the dragon stencil to make the path to the castle.


Not sure how I made this background, but thought it was fitting for the Phoenix,  
Used translucent paste, then covered in clear mini beads. Once dry placed stencil back in place and with black archival ink coloured the clear beads. was happy with this technique as the phoenix was still translucent and could make out the colours coming though the beads. high-lighted with white pen.  

for my final sample I used the sweet poppy stencil tag die. Using mowed lawn and spiced marmalade oxide inks blended onto my tag, inked through leaf stencil with mowed lawn,  then slashed ink from a green and orange sparkle pen onto the background. Stenciled Dragon with copper paste onto white card, then heated until it bubbled, once dry coloured with zig pens and water, cut out by hand then mounted with foam pads.
Hope you enjoy the shows, look forward to sharing more samples soon.

Monday, 14 May 2018

Honey Doo Stamps Hochanda shows 


Honey Doo crafts are back on your screens today at 12 and 4pm. Tune in to Hochanda to watch Amanda doing some brilliant demos with the newest releases, which include some great new stencils.

My first sample includes the New circle Stencil very faintly on the main card background. I masked of the edge of my card with low tack tape to give my a white edge. Then I used Wild Honey, Squeezed Lemonade an Mustard seed distress ink, from the bottom left corner towards the top right hand corner leaving some white space at the top. I then stamped the Blooming Flouish stamp with black versafine  then embossed with Honey Doo crystal clear embossing powder. I painted the the stamped area with Purple Topaz, Lime Zest and Sour grape Honey Doo mica powders. Then stamped Thank you stamp with Versamark and gold embossing powder. Placed a small lilac bead in the Center of each flower.


Distress oxide on tag, distress ink on card. Mustard seed, Ripe Persimmon and Worn lipstick.
Honey Doo New beginnings image stamped with black onyx versafine embossed with crystal clear embossing powder. Coloured the stamped image with sparkle pens,highlighted tree with a white pen, used a paper doily as a stencil for the sun area then stamped sentiment from the set in the sun.  Used the New mesh stencil on the background and the same colour distress inks as on the tag. Made a smaller tag for the Cheers sentiment, stamped in onyx black versafine then embossed with crystal clear embossing powder also stamped just the bottle and glass from the main stamp onto the tag. Then drew wonky lines around edge with a black Pen.


For my next sample I used Distress inks, salty ocean, evergreen bough and shaded lilac. Stamped New beginnings stamp onto the background card then coloured using sparkle pens, then highlighted with white pen. The background was inked with the same coloured inks as above randomly with the Mosaic stencil.I stamped the Blooming Flouish onto some acetate then trimmed it to use as am embellishment.


The background for this card was made with distress inks, evergreen bough, and wilted violet. Used the Encircle stencil over the wilted violet area, then stamped Butterflies flight with black onyx versafine and embossed with crystal clear embossing powder. Then using Honey Doo mica powders I coloured the buttterflies with Raspberry Ripple, Lime Zest, Lemon Sherbet and blue lagoon. The card I mounted onto was black, lilac and green, used the wilted violet on the green card through the
Encircle stencil.


This card was quick and easy to make. I randomly stamped the Ornamental Flourish stamp onto the background card, then stamped Ornamental flourish and Thank you  stamp onto a 6x6" card, with versamark and gold embossing powder. then painted the flowers with ripe Permission and worn lipstick distress ink. Layered onto gold mirror card.


for my next card I used shaving foam with brushos sprinkled on top swirled the end of a paint brush  through it, placed a piece of centura pearl card on top, lifted off shaving foam then scrapped excess away with a palette knife. stamped New beginnings stamp with black onyx versafine ink, coloured with sparkle pens, tree highlighted with  a white pen. Masked off a border area on the background paper with masking tape, then taped down the Mosaic Stencil ,  then used  wilted violet  distress ink and a black pen to make my border. Five tiny pearls on 2 corners.


For the background of this card I used the brickwork stencil,  and Tea dye distress ink. I used sparkle pens on the tag, I brushed over  the tag with five different coloured pens then washed over with a wet brush.Once dry,  stamped Butterflies flight with black onyx versafine then embossed with crystal clear embossing powder. words from the Birthday star set of New stamps. Embellished with card candy.